How to Get More Out Of Planks For Core Strength
2019-10-22

DVRT UK Master, Greg Perlaki (Creator of DVRT Dynamic Warm-up Program)

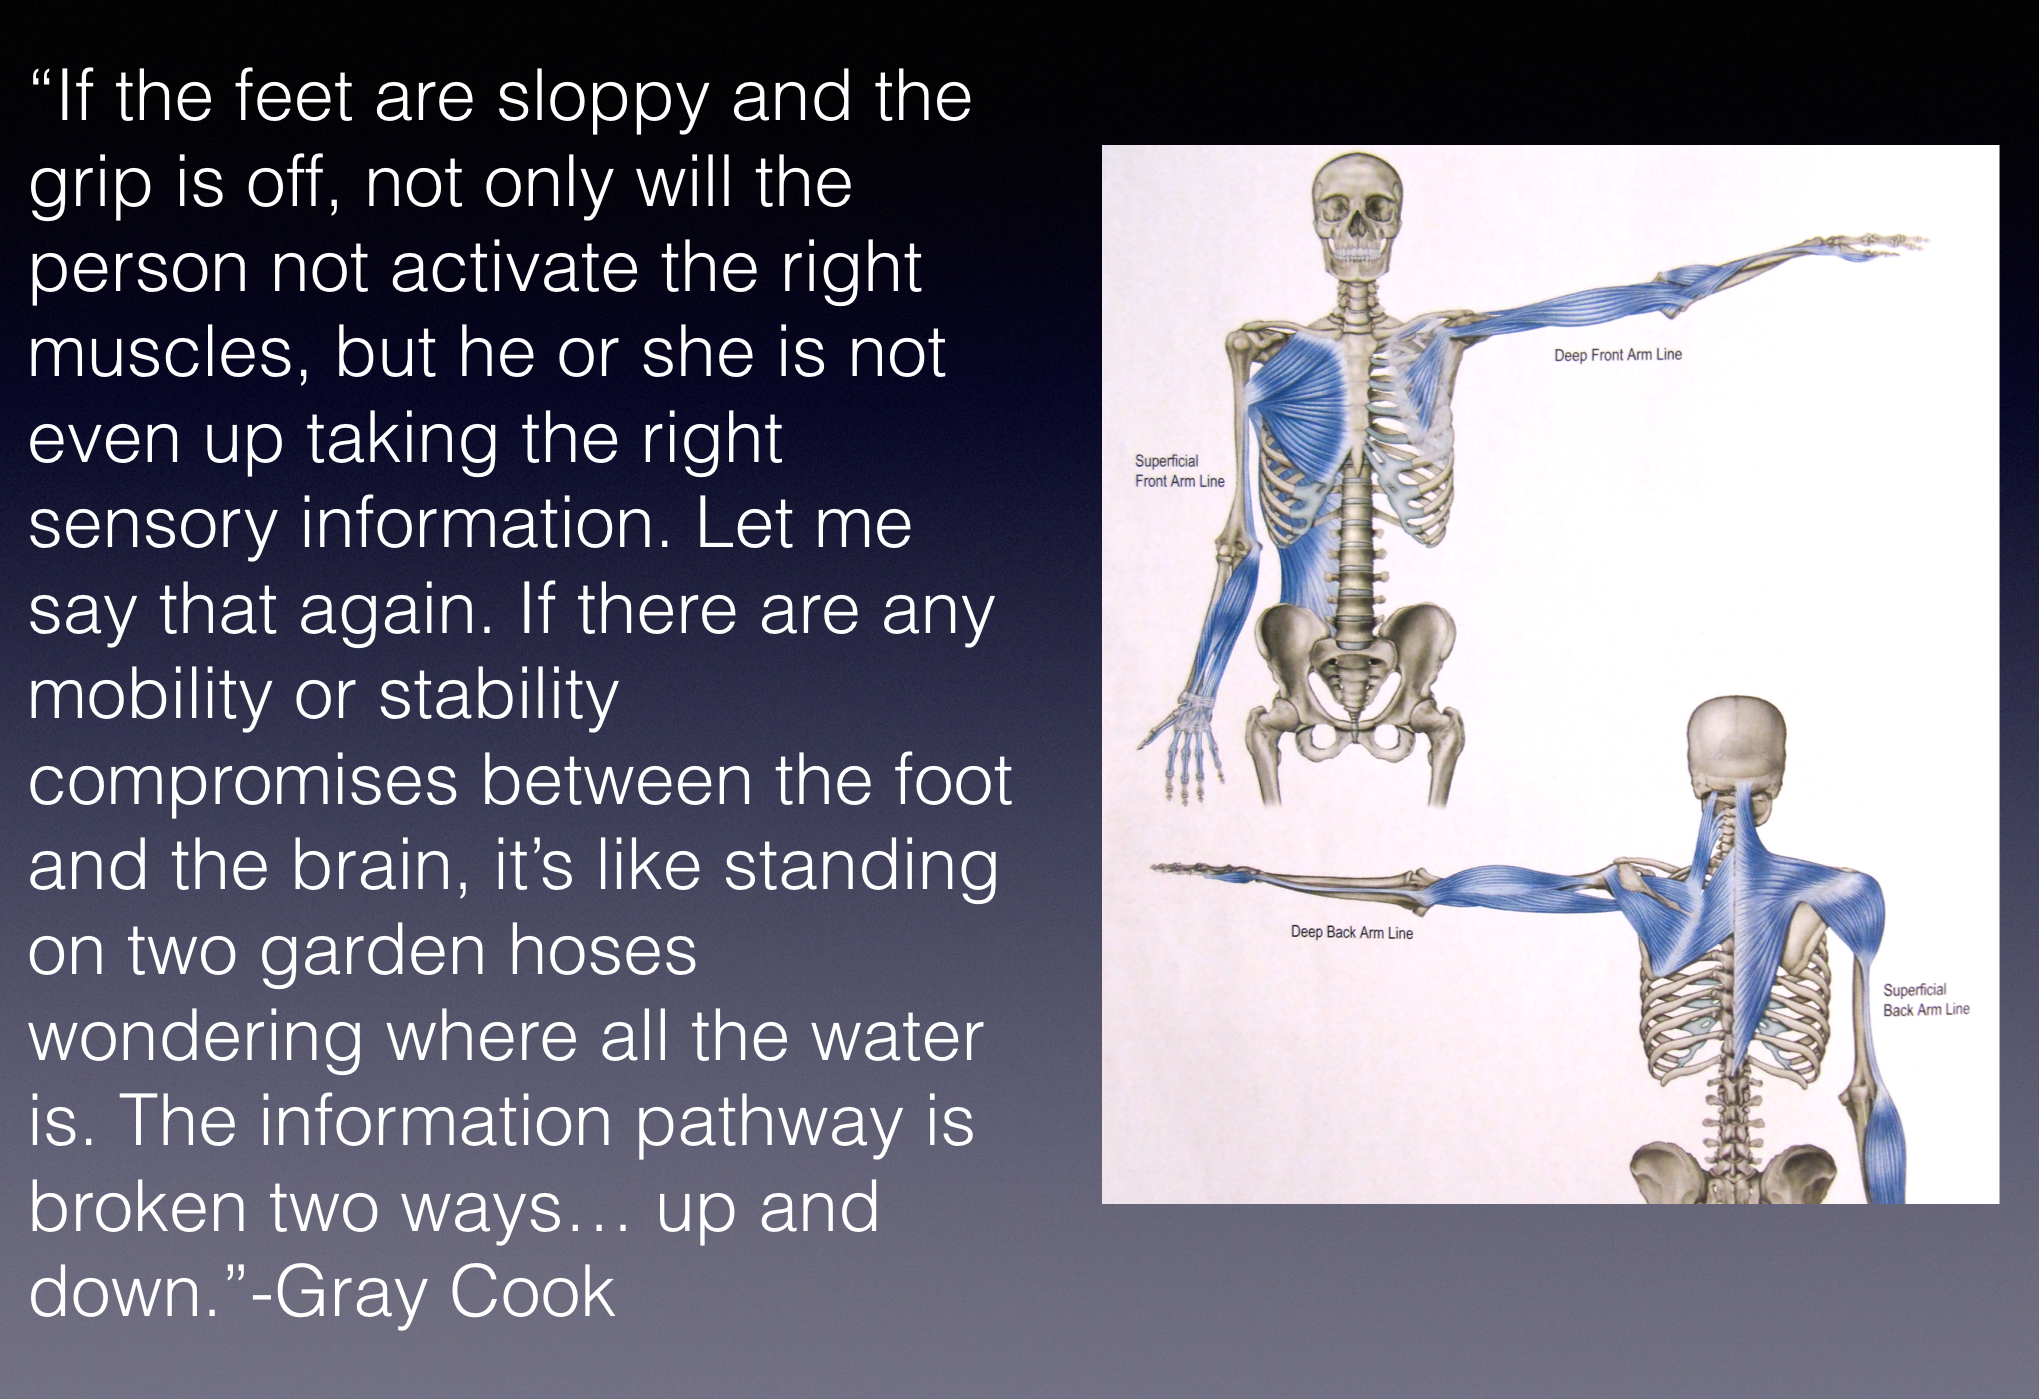
There’s a common theme that keeps coming back when it comes to functional training. Many of us (including myself) have talked about this simple concept before (like last week on the Half Kneeling Arc Press you can read HERE) and it is the importance of using the hands and feet. Since force enters the body from the ground up, our hands and feet play a really important role to stabilize the body. They’re like the first connection to our extensive core musculature.
What would be better example of core training then planking. Planks are only really valuable if we can progress them to more dynamic environments. That’s why planks keep coming back in our DVRT system. Whether it’s any of our hip hinges, all the front loaded positions, press outs or overhead presses, planking is done with purpose and intent to integrate the body and to achieve better results.
Our DVRT movements have planks in so many different ways!
3 Simple Steps to Succeed at Better Planks
There is probably no better example of how we start manipulating planks than our lateral drags. While dragging lots of different “stuff” has become popular, people miss on the nuances that make the DVRT lateral drags so different. It isn’t JUST about moving the weight back and forth, but doing so while connecting the body’s chains to teach core stability in smarter ways. The friction we create, the grip we take, the position of the weight, there are so many “little things” of our DVRT planks that are very BIG deals.
I know that the Lateral Bag Drag can be broken down many different ways, however I wanted to approach this a very simple way when people can learn the principle and execution with intent. I will outline a few options at the end of this blog how to regress and what are the options in case progressing the Lateral Bag Drag further.
Iso Pulls
Most people are surprised that we start with load and just learning to create tension. Why? Because making those connections in very deliberate ways allows us to teach our body HOW to resist the forces that make these planks so powerful. As you see, how you set-up and grab the Ultimate Sandbag is key, but as Dr. Brandon Marcello says stability is about “allowing wanted movement and resisting unwanted movement.”
Taking another step closer to the Lateral Bag Drag, now we are actually going to touch the Ultimate Sandbag. Yay:D Exciting times! This kind of reminds me of those couple of months when I did water polo in Hungary as a kid. Except that we didn’t even see the balls. Training was about swimming for hours. I was not a fan of that.
https://www.instagram.com/tv/B3zLIUnH1wi/
Tanya Miszko shows how we want to emphasize the right concepts in our ISO pulls.
Coming back to our Bag Drag, the previous steps are crucial to be truly successful in this really powerful exercise. We’re now going to introduce the concept of time under tension (just as last week’s Half Kneeling Arc Press) pulling/pushing the handle down for 3 seconds.
The reason the Iso Pull could be easier than those leg lifts is because we can use one of the handles of the USB to create even more stability than before. The placement of the sandbag is key as the pulling arm ( I should say pushing down) should be straight and the lats are engaged.
Stability is created with the hands and feet as we have gone through all the steps before and at this point the Ultimate Sandbag could start moving with good enough tension. Aim to complete 5 repetitions for 3 seconds isometric contraction on each side without any rotation in the hips. Planks are meant to be stable.
Lateral Bag Drag
Hopefully by this time we’re now understand what is it that needs to be done with the hands and the feet in order to prevent any movement in the torso. The measure of success is doing 3 seconds drags with stable core and no movement with the hips, keeping the shoulders over the hands. At this point the weight of the sandbag is secondary. Start with a lighter weight (Core or Power Ultimate Sandbag – see the weight recommendations below) and focus on slowly executing the drag. The setup is crucial, as the USB should stay below the waistline, keeping the lats active. I personally like to place the sandbag right to my knees as I’m on all fours and just extending the legs to a high plank. Needles to say that the main action is a DRAG and NOT a lift so the bag doesn’t come off the floor.
Note that, the dimension of the USB and the friction between the bag and the floor makes this a unique experience. Also worth mentioning that the best surface for the bag drag is flat, non sticky, ideally wooden floor, carpet or astro turf and definitely NOT asphalt. There is some difference within the suitable surfaces too.
Regress to Progress
Not everyone will be ready for all of the above and that is okay. As coaches, we more often need to regress than progress. However, regression should be focused upon the improvement. That’s why in the DVRT System everything builds on each other and as long as we understand the principles we know when to take a step back or step forward.
Without going into extensive detail, the natural step back from all of the above is our Bird Dog progressions. Worth mentioning that just because we’re good to do the Lateral Bag Drag without any issues, that doesn’t mean we should stop doing the regressions (like Bird Dogs). They should have their place in our training program, for example warm ups, recovery days and so on. I personally use all the regressions daily, as part of my warm up routine.
High Plank Shoulder Taps
Most people assume because there is no load that the shoulder taps are a less advanced plank than our lateral drags. In actuality, because we have to more reflexive and rely less on the tension from our grip and drag, the shoulder taps are more advanced. It’s also the perfect opportunity to teach clients how to use their hands and feet to create stability. As I said at the beginning the hands and feet are a recurring theme in DVRT. It’s no different here. That’s why I said in the video below that what you see me doing with the USB (during the Bag Drag) is not that important what you cannot see. I am referring to the action of the hands and feet of course.
Spreading the fingers out and actively grabbing the floor with the hands is more important than tapping the shoulder with the other hand. A lot of the shoulder problems can be fixed with just this simple tip to grab the floor, corkscrew the shoulders and pack the lats. Very similar to the action of the feet, which is digging into the floor, lock the knees and even turning the heels out slightly. If you can take away one thing from this blog post, let this be the one: Push down to create stability.
Beyond Lateral Drags
Once we have established all the foundations of the Lateral Bag Drag then we can work towards a more personalized goal and follow the ‘Big 6’ standards. As our training philosophy says, to make an exercise more progressive we should change the loading position first (introducing an X Man Drag – cross patterning or doing Arc Press Drag), then manipulating the body position after (Quadrupled Drag, Bear Crawl Drags to different directions) is a natural way to increase the intensity of the exercise.
List could go on forever with adding different movements like push ups, sit throughs and so forth. The main takeaway for me personally is to bring the concepts of DVRT closer to more people with our ‘Big 6’ and showcase how extensive our training system is.
Featured in
© 2026 Ultimate Sandbag Training. Site by Jennifer Web Design.