Why THIS Key Workout Concept Unlocks Better Squats & MORE!
2023-03-22
Cory Cripe, Fitness Lying Down (Creator of Dynamic Strength & Movement Strength Program)

Hello all and welcome back! If you remember, my last blog about programming with the DVRT system (you can read it HERE) was all about creating training sessions with movement being the emphasis and not so much exercises. If you missed that one you can find it I highly recommend you dive into that before exploring this next variable in programming.
Moving on to the next DVRT concept, I am excited to break open for you…drum roll please…the holding position. How anticlimactic was that!?!?! You were expecting some grandiose, ground breaking idea and then all you get is holding position. However, when you can understand the concepts of this important piece of DVRT the doors will open wide for you to understand how to seamlessly turn the heat up (or cool it down) regarding intensity – all based on where the Ultimate Sandbag is placed on the body.
Why do we such an odd seeming concept as an important training variable? For one, it greatly expands how we can use DVRT Ultimate Sandbag Training to solve more of our training needs. Typically people only think of using more or less weight and/or reps. However, what if you want to teach someone how to squat? The way we use and hold the Ultimate Sandbag would be quite different than what we would do to challenge someone’s stability and strength at the same time.


Now, I know what you are thinking, “Cory, if this is so great how come other fitness programs don’t really talk about holding position of a weight?” Well, there are a few reasons. The first is that most other tools don’t allow you anything close to the options the Ultimate Sandbag does. For example, if we are looking at the barbell and squats we can hold the barbell on our back, in front of our body, and overhead. While those 3 versions are used, that’s it so it doesn’t seem all that important, especially because overhead is seen more of an upper body drill anyways. However, with the Ultimate Sandbag we can hold the weight in at least 7 different ways when we squat, so it becomes a much bigger variable in our training. Because a lot of the familiar tools that people use in the gym (barbells and dumbbells for example) don’t offer anywhere close to that many options people really don’t know this is something we can use to add way more progression and success to our training.
In the DVRT universe there are technically 11 different holding positions, but for the sake of convenience I will be addressing my personal favorites we use at Fitness Lying Down. I want you to use your imaginary marker and draw a line from the top of your head straight to the bottom of the floor. This line separates your right side from your left side – this is the midline of your body. Know this, the closer your implements are to this line, the more stable the position the better it is to learn about movement. This is where we begin our progression journey.

This is a big reason the Ultimate Sandbag shoulder squat is such a tough exercise to do well!
Starting with the most stable of holding positions: The Bear Hug (Press Out is more of dynamic action that you can learn about HERE, we are going to discuss more of the static holds of the weight). Two considerations when using the Bear Hug hold:
The top of the USB should be right below your chin


If you Bear Hug Clean the Ultimate Sandbag correctly you should look like the position on the left, if you over clean the weight and get in an incorrect position it will look more like the right.
Hold tightly onto the Ultimate Sandbag and don’t grab on to your arms.
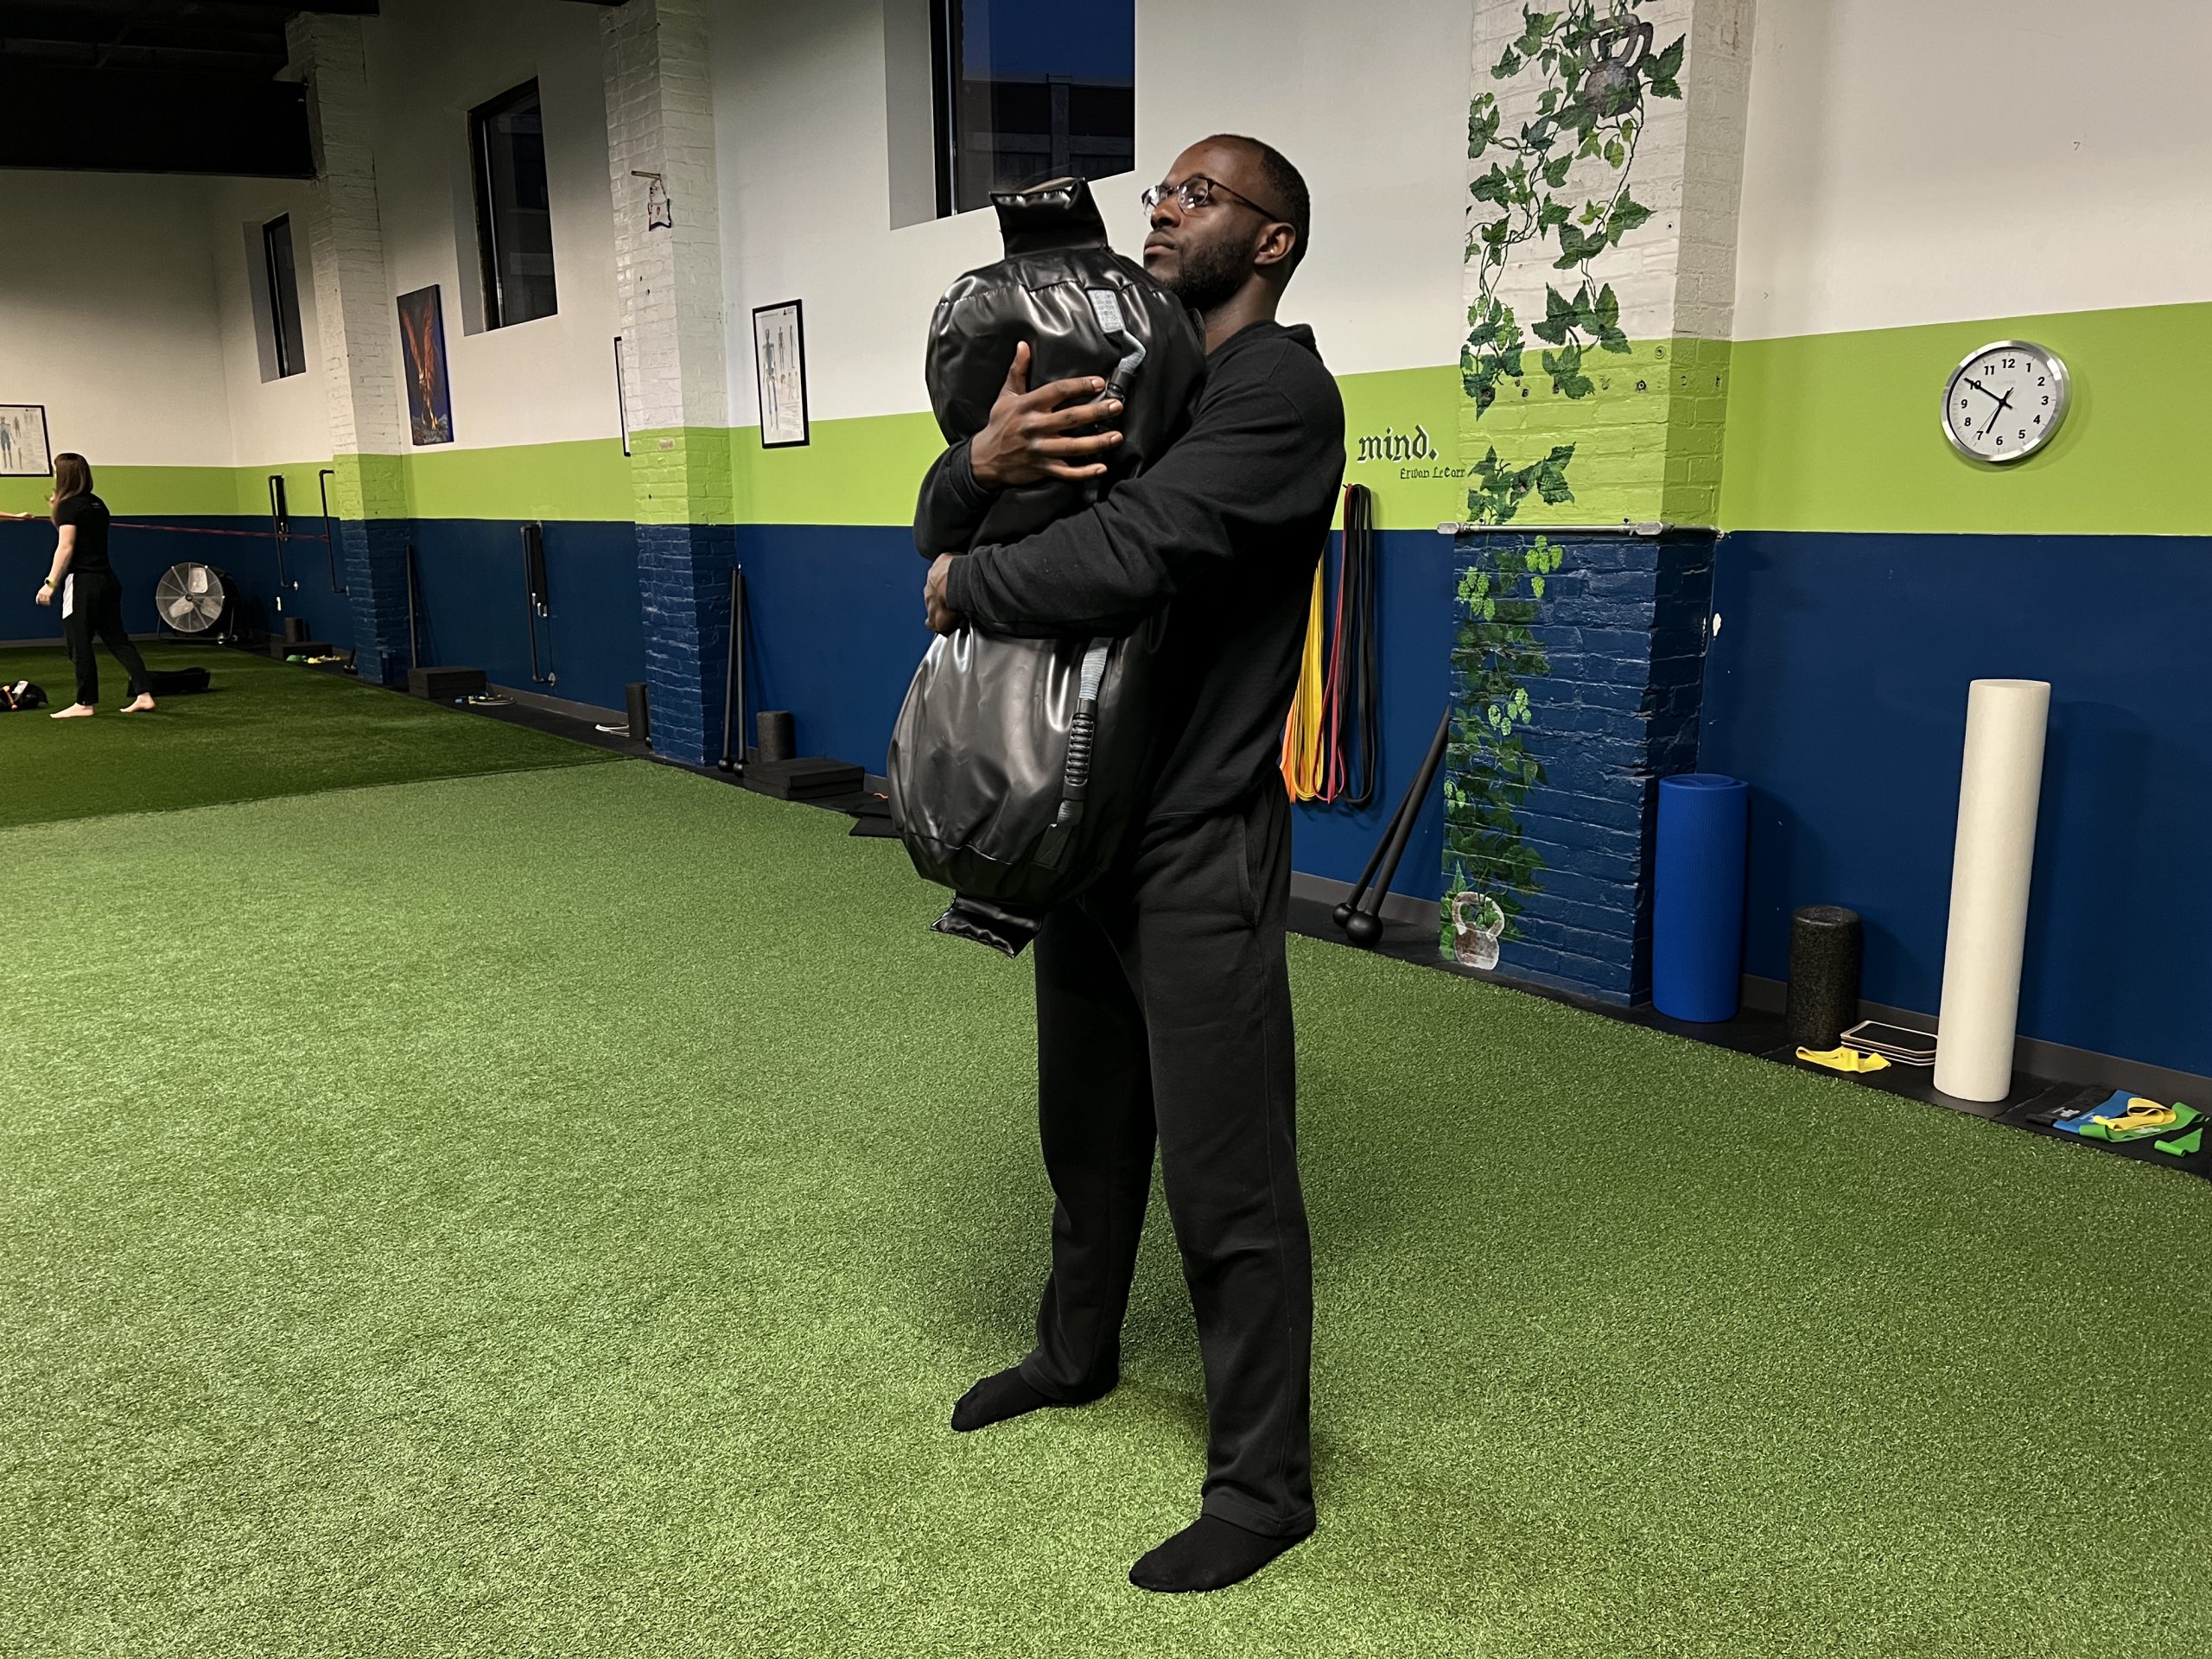

Clasping the arms like the pic on the right causes us not to be able to create proper tension agains the Ultimate Sandbag and we end up using our upper traps and low back more than our lats and core like we do in the picture on the left.
Our next holding experience is the Front Load (FL) position. This cannot be confused with the barbell Zercher hold. When in the FL position the USB will be placed in the crook of your arms with the bag held high and tight against the chest – you will find your forearms running perpendicular to the ground when correctly standing in the FL holding position. Moving the USB from the bear hug to the FL demands more from the core muscles; we like to compare the front loaded holding position to the popular front plank, but in a standing position.
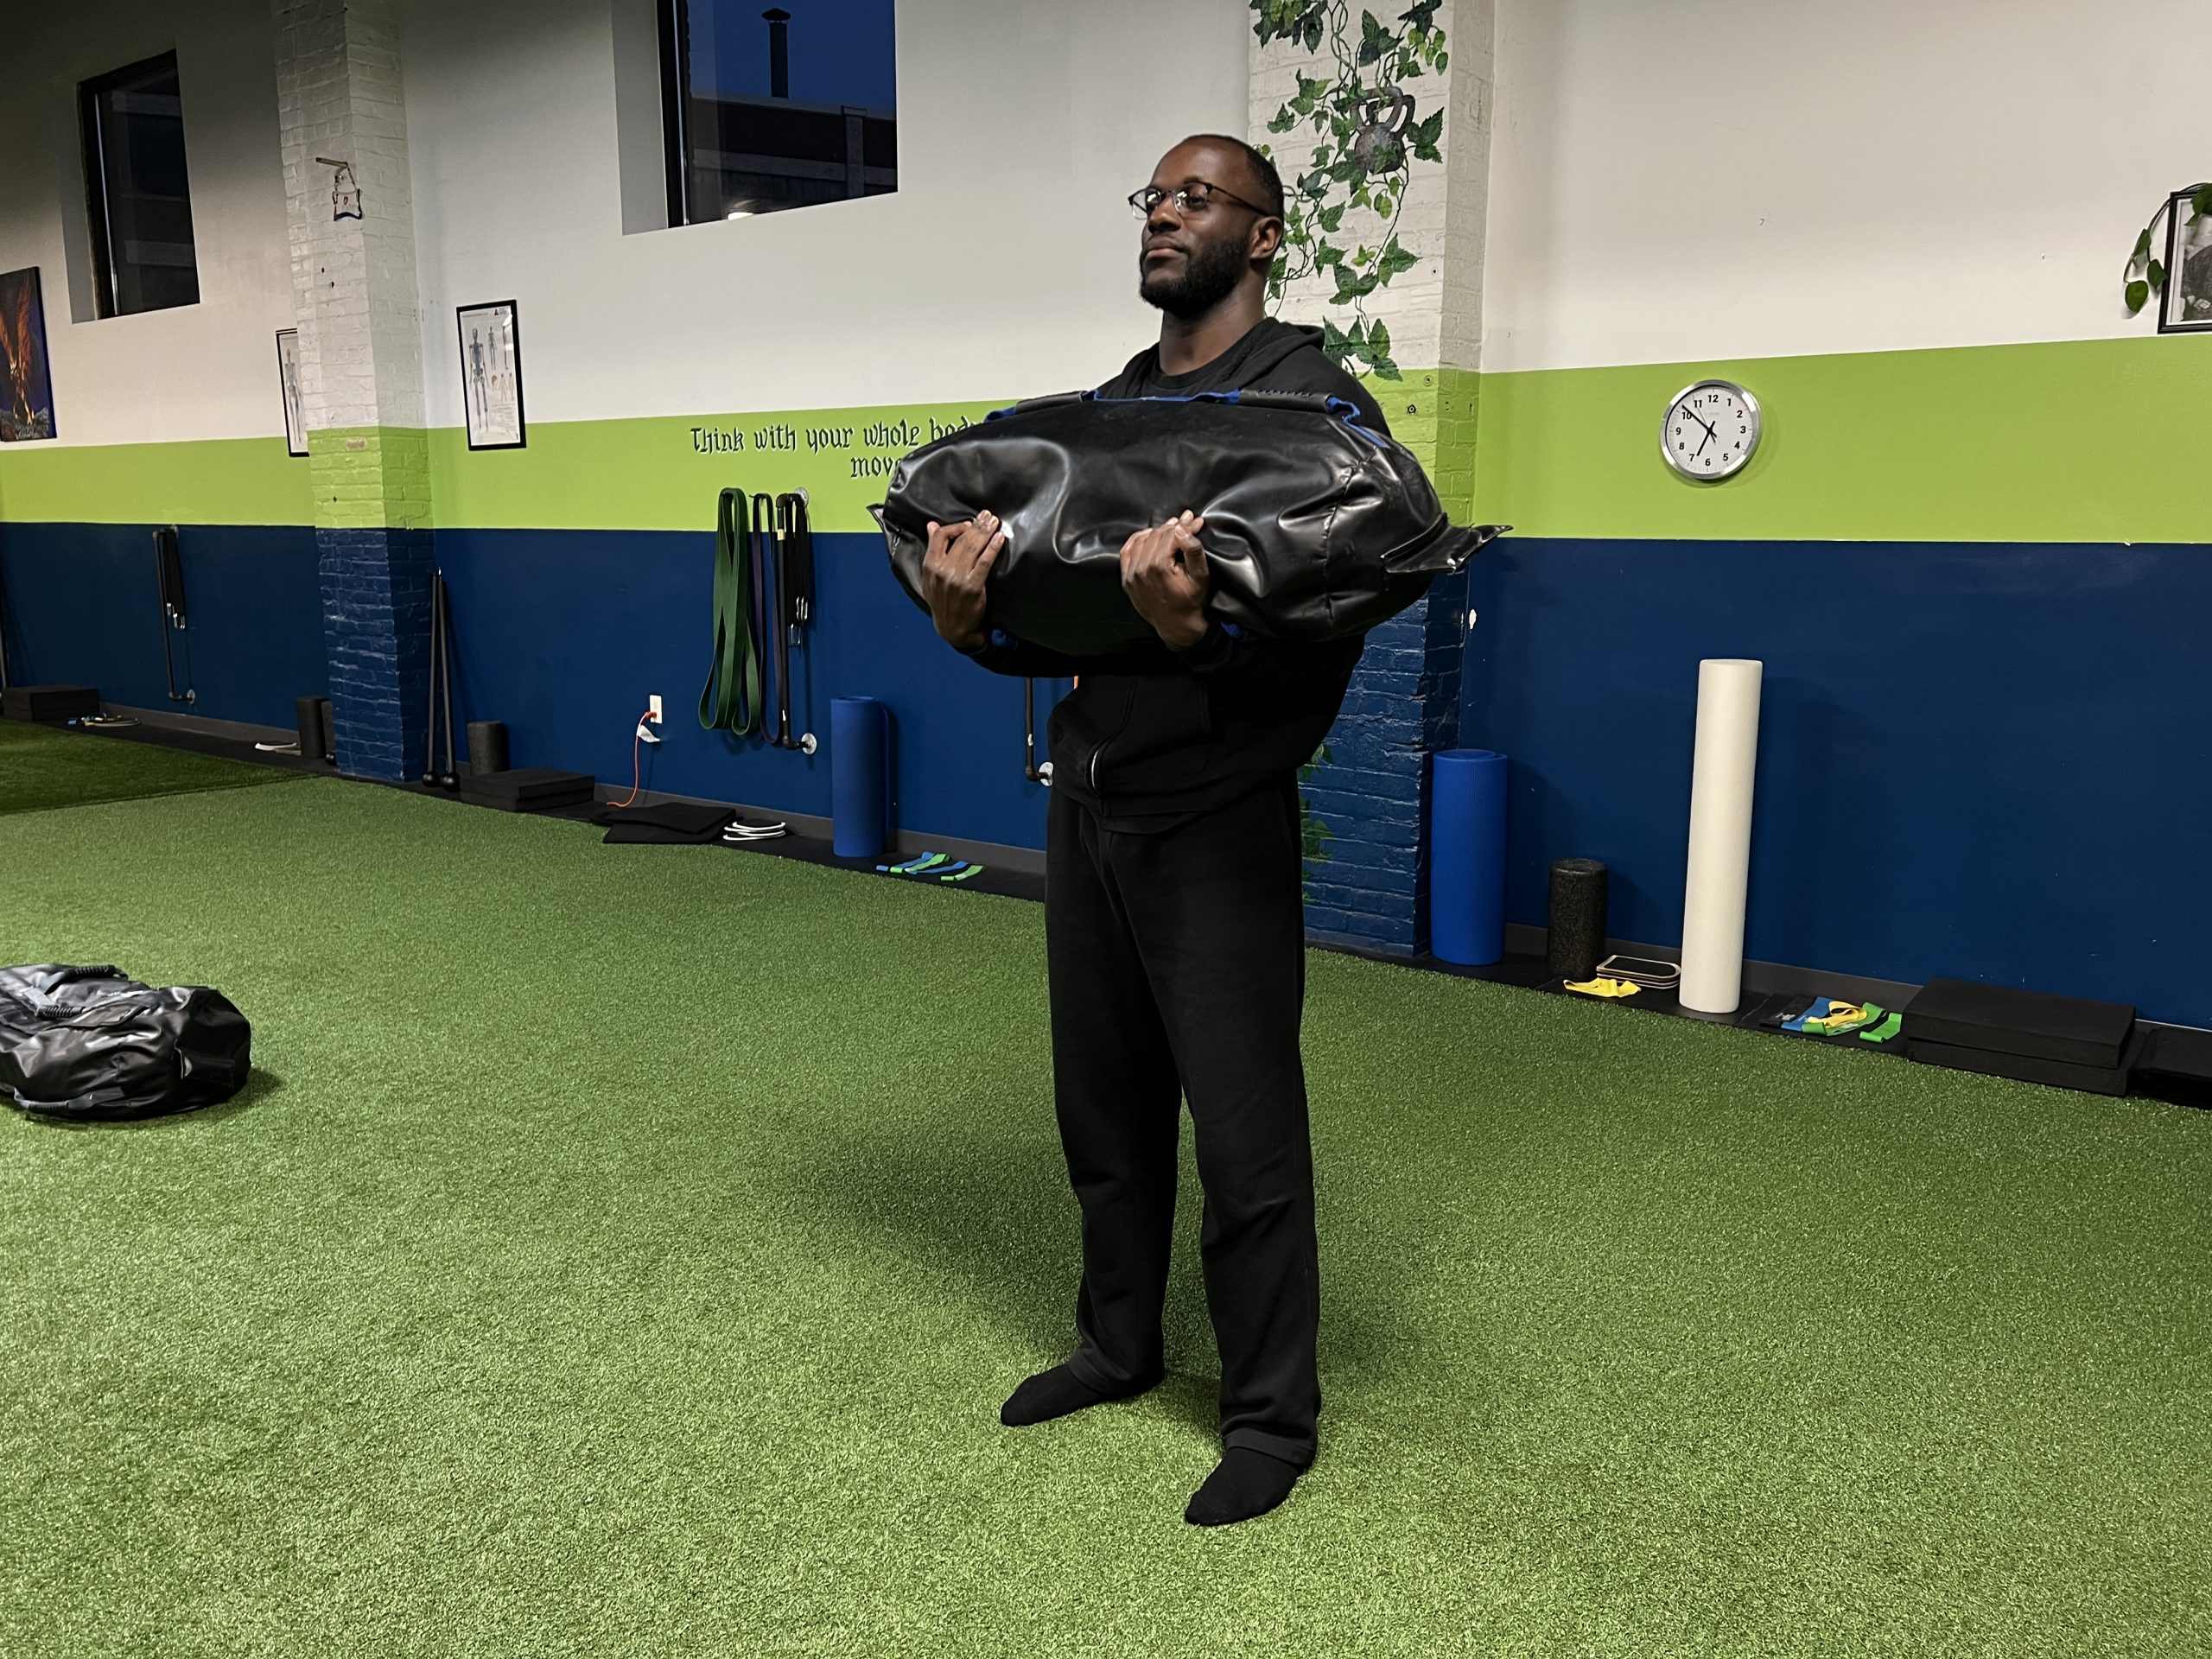

On the left the elbows are dropped and if the lifter tries the hold the weight like a barbell (because the barbell has no significant dimension) then we lose core activation and strength in the movement. Holding tension against the Ultimate Sandbag (like the pic on the right) while aiming more closely to a vertical forearm position (we don’t want to force it where we raise our elbows too high) then we get great core activation and strength/mobility in the lower body.
It may not appear to be as dramatic of a change as moving from the bear hug to the FL holding position, but our next progression will be the fist-loaded holding position (FstL). Remember the midline and how moving implements further away from that imaginary landmark increases the intensity of certain drills. Not only moving the USB further away, but having it press down on your body even more in a less stable environment i.e. your fists puts even more pressure on your core muscles which can create havoc when performing squats, lunges, & carries – oh my!
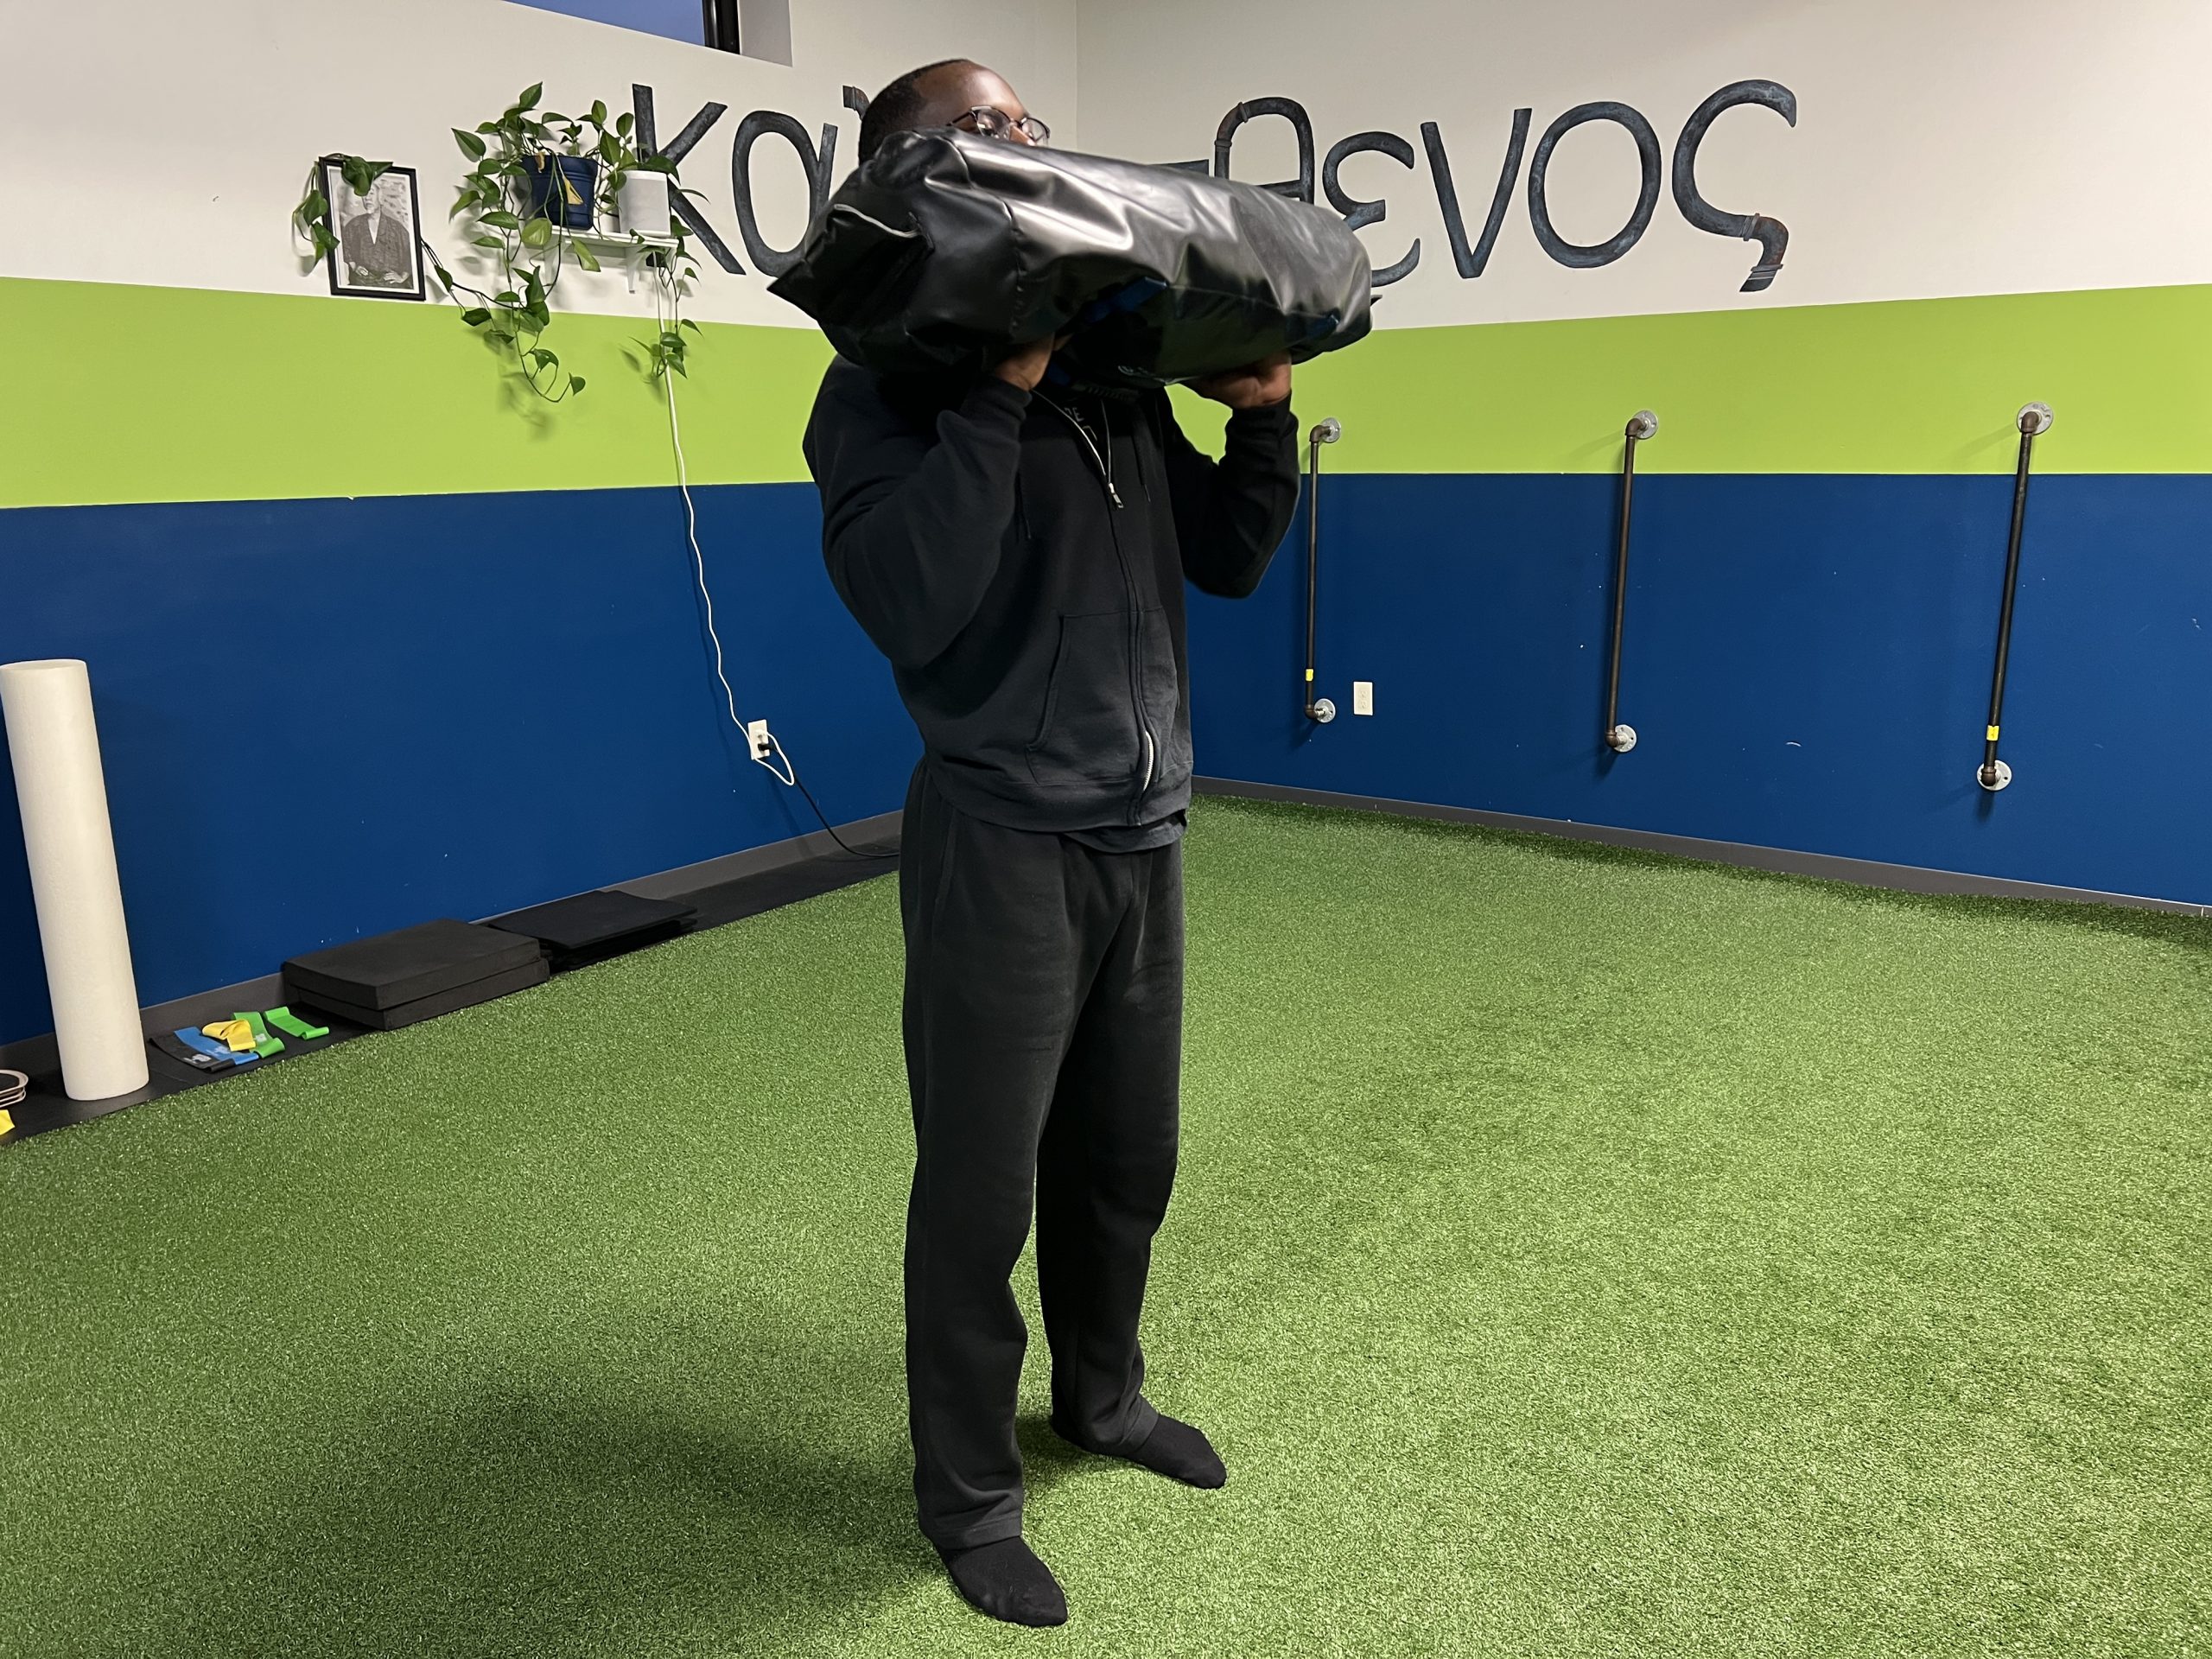
The Fist Loaded position takes away the feedback we get in the Front Load and makes it more challenging and feel less stable. You see the correct position is having the fists about shoulder width apart if not slightly wider. If the hands end up significantly inside the shoulders this is an incorrect position to hold the weight.
How can you make holding an Ultimate Sandbag more unilateral (or one-sided)? Well, moving to an offset holding position of course! With the core and power USBs this is pretty simple and easy to do because you just grab onto the outside handle. However, with the force, strength, & burly USBs this can be a little more tricky. You will find that the larger bags have a flap on the ends. Avoid directly grabbing onto these, instead roll them up and create a “fat grip” on the end of the USB. This will be more difficult on the grip strength, but the juice is worth the squeeze. Trust me!
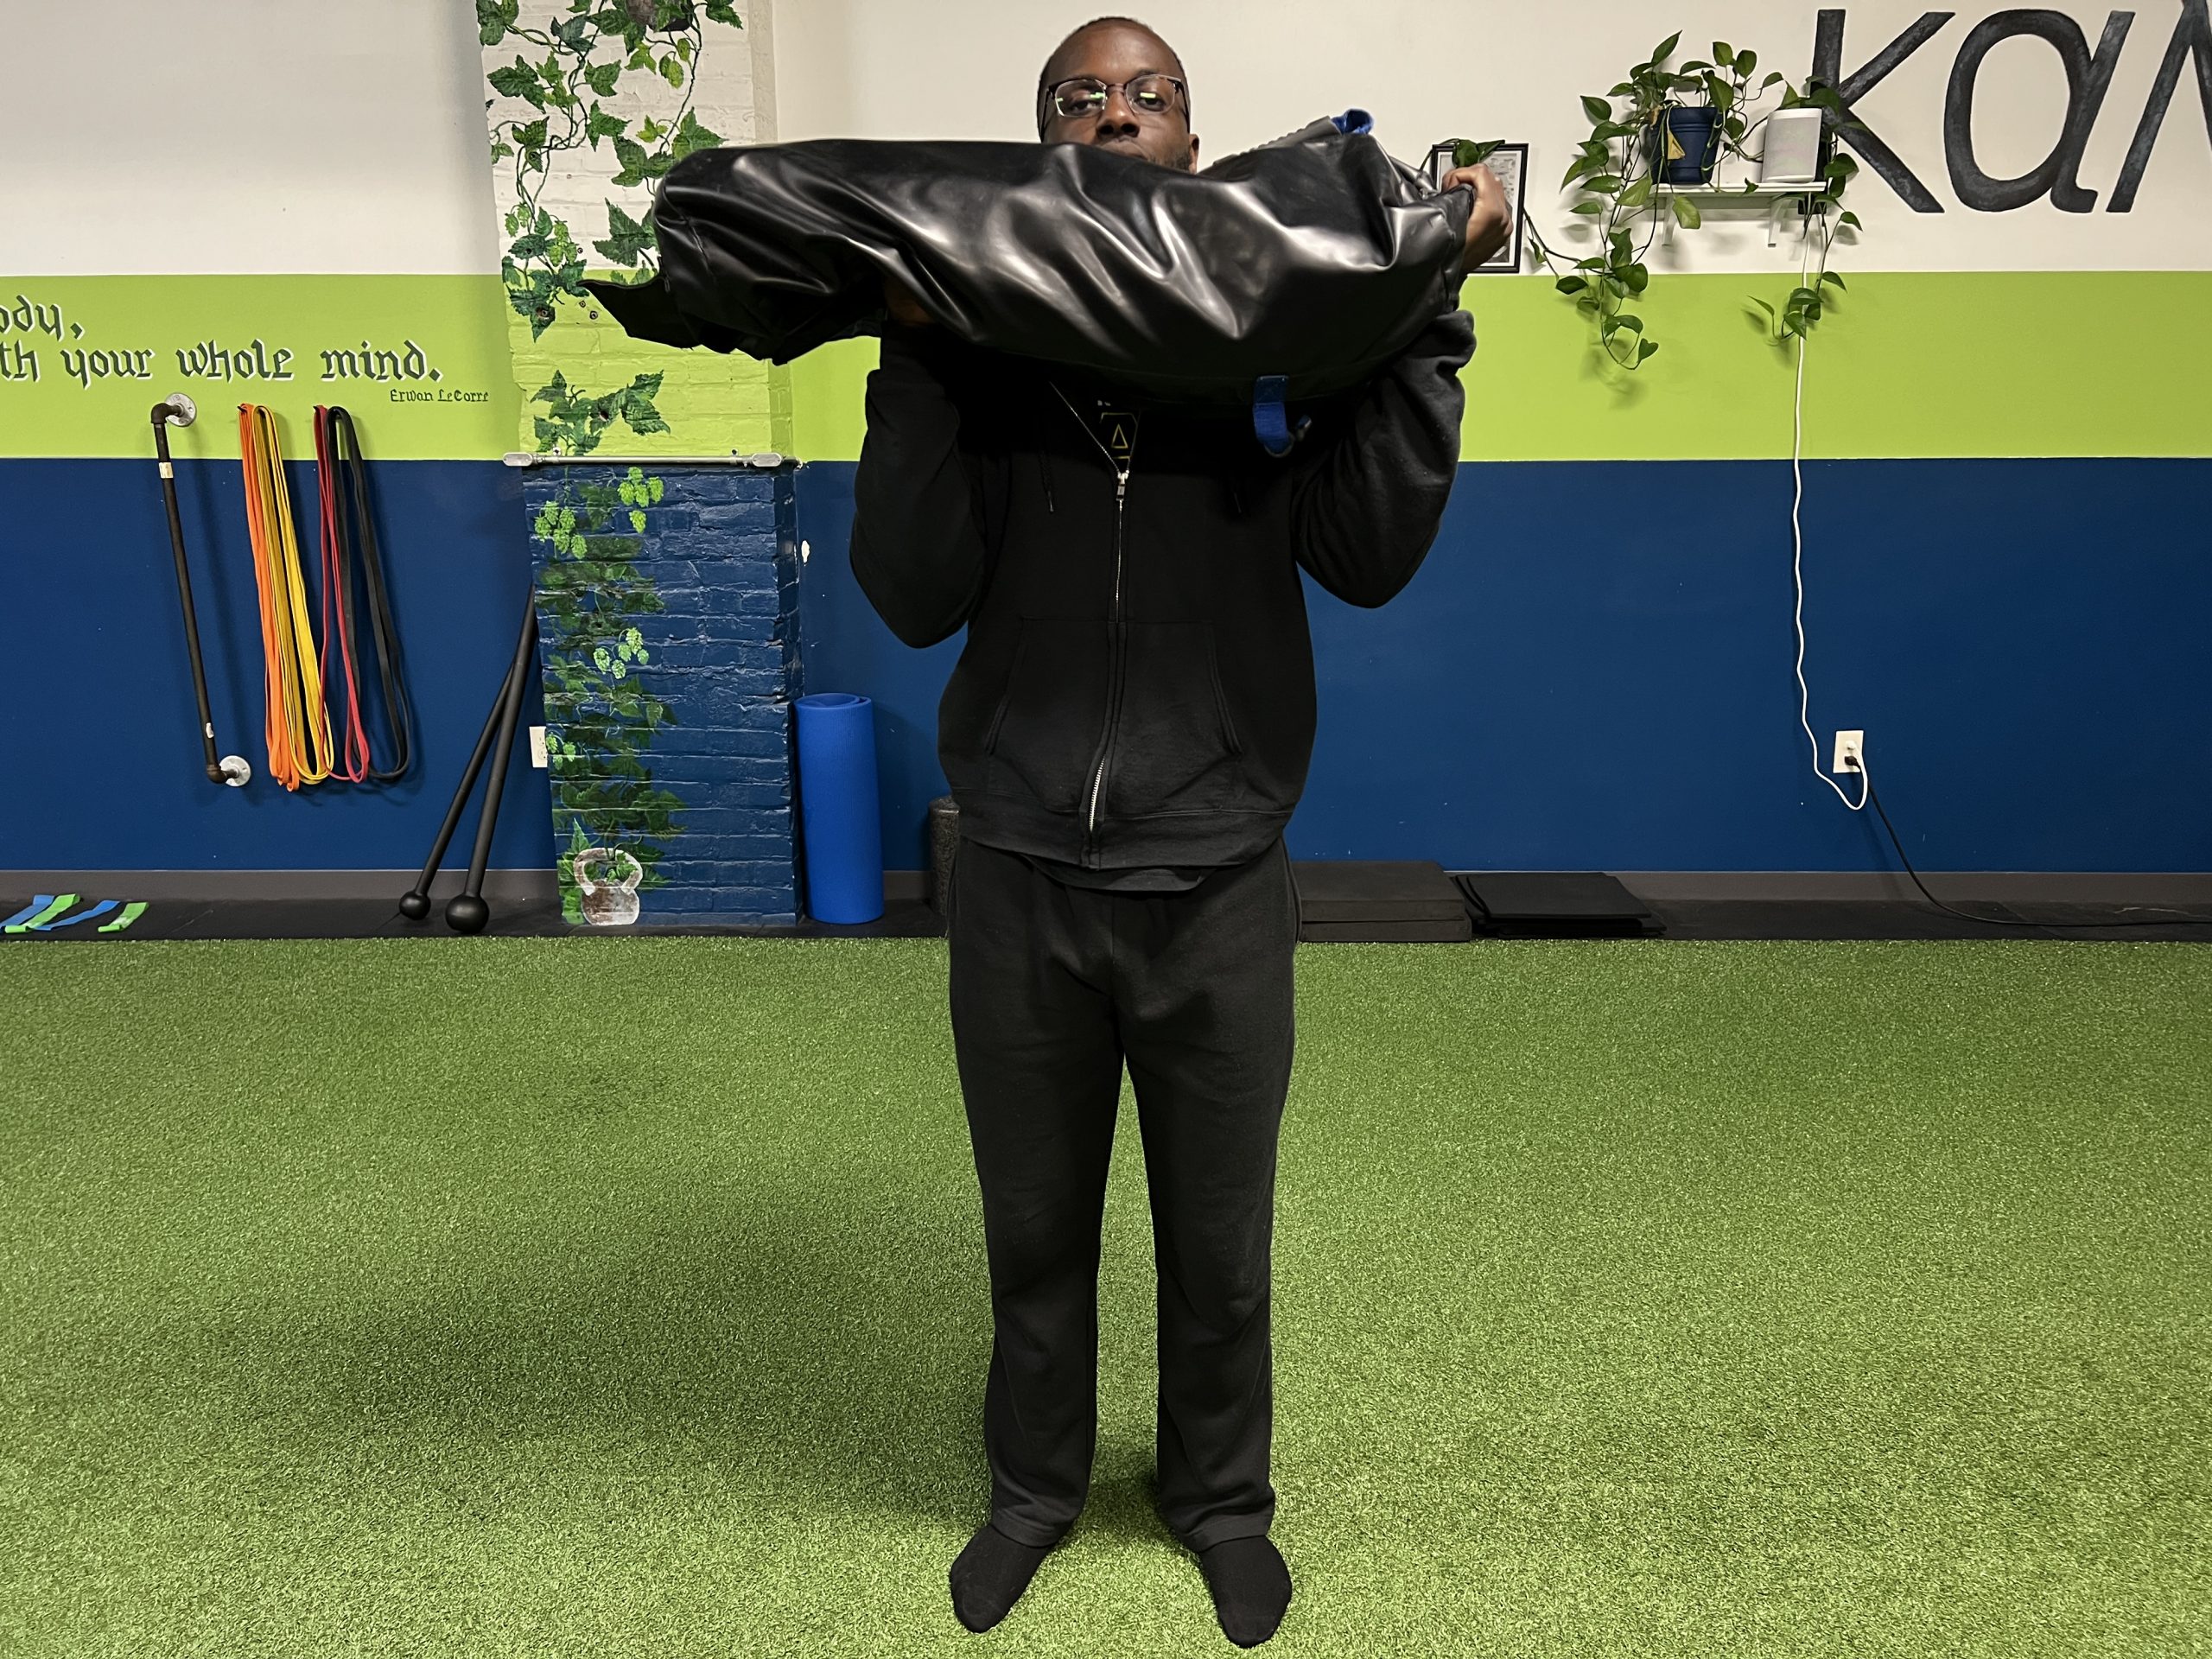
The goal of using flaps on the bigger USBs is to create a thick grip so we can get tension on that side to help stabilize the unbalanced load. This is a very important progression to more unilateral loading of the body for a variety of exercises.
The arm that is not holding onto the side of the USB will be the dominant moving limb whether holding onto the handle (for example a bent-over row) or placing the USB on the fist (preparing for an overhead press). Such a subtle “sprinkle” (a term we like to use at FLD whenever we progress an exercise), but very effective. You will be amazed with how moving from FL to FstL to Offset can make the same Ultimate Sandbag feel 10-20 pounds heavier in any given exercise!
The final position I want to go over is the shoulder hold. In case you were wondering you will now find the USB on a shoulder ::MIND BLOWN:: Once again, I would like to refer back to the midline and moving implements further away increases the intensity. Moving the USB to the shoulder dramatically separates the implement from the midline creating lots of frontal plane craziness! To simplify the frontal plane craziness, I only mean holding the USB on the shoulder will create more temptation to be drawn side to side when performing any drill.
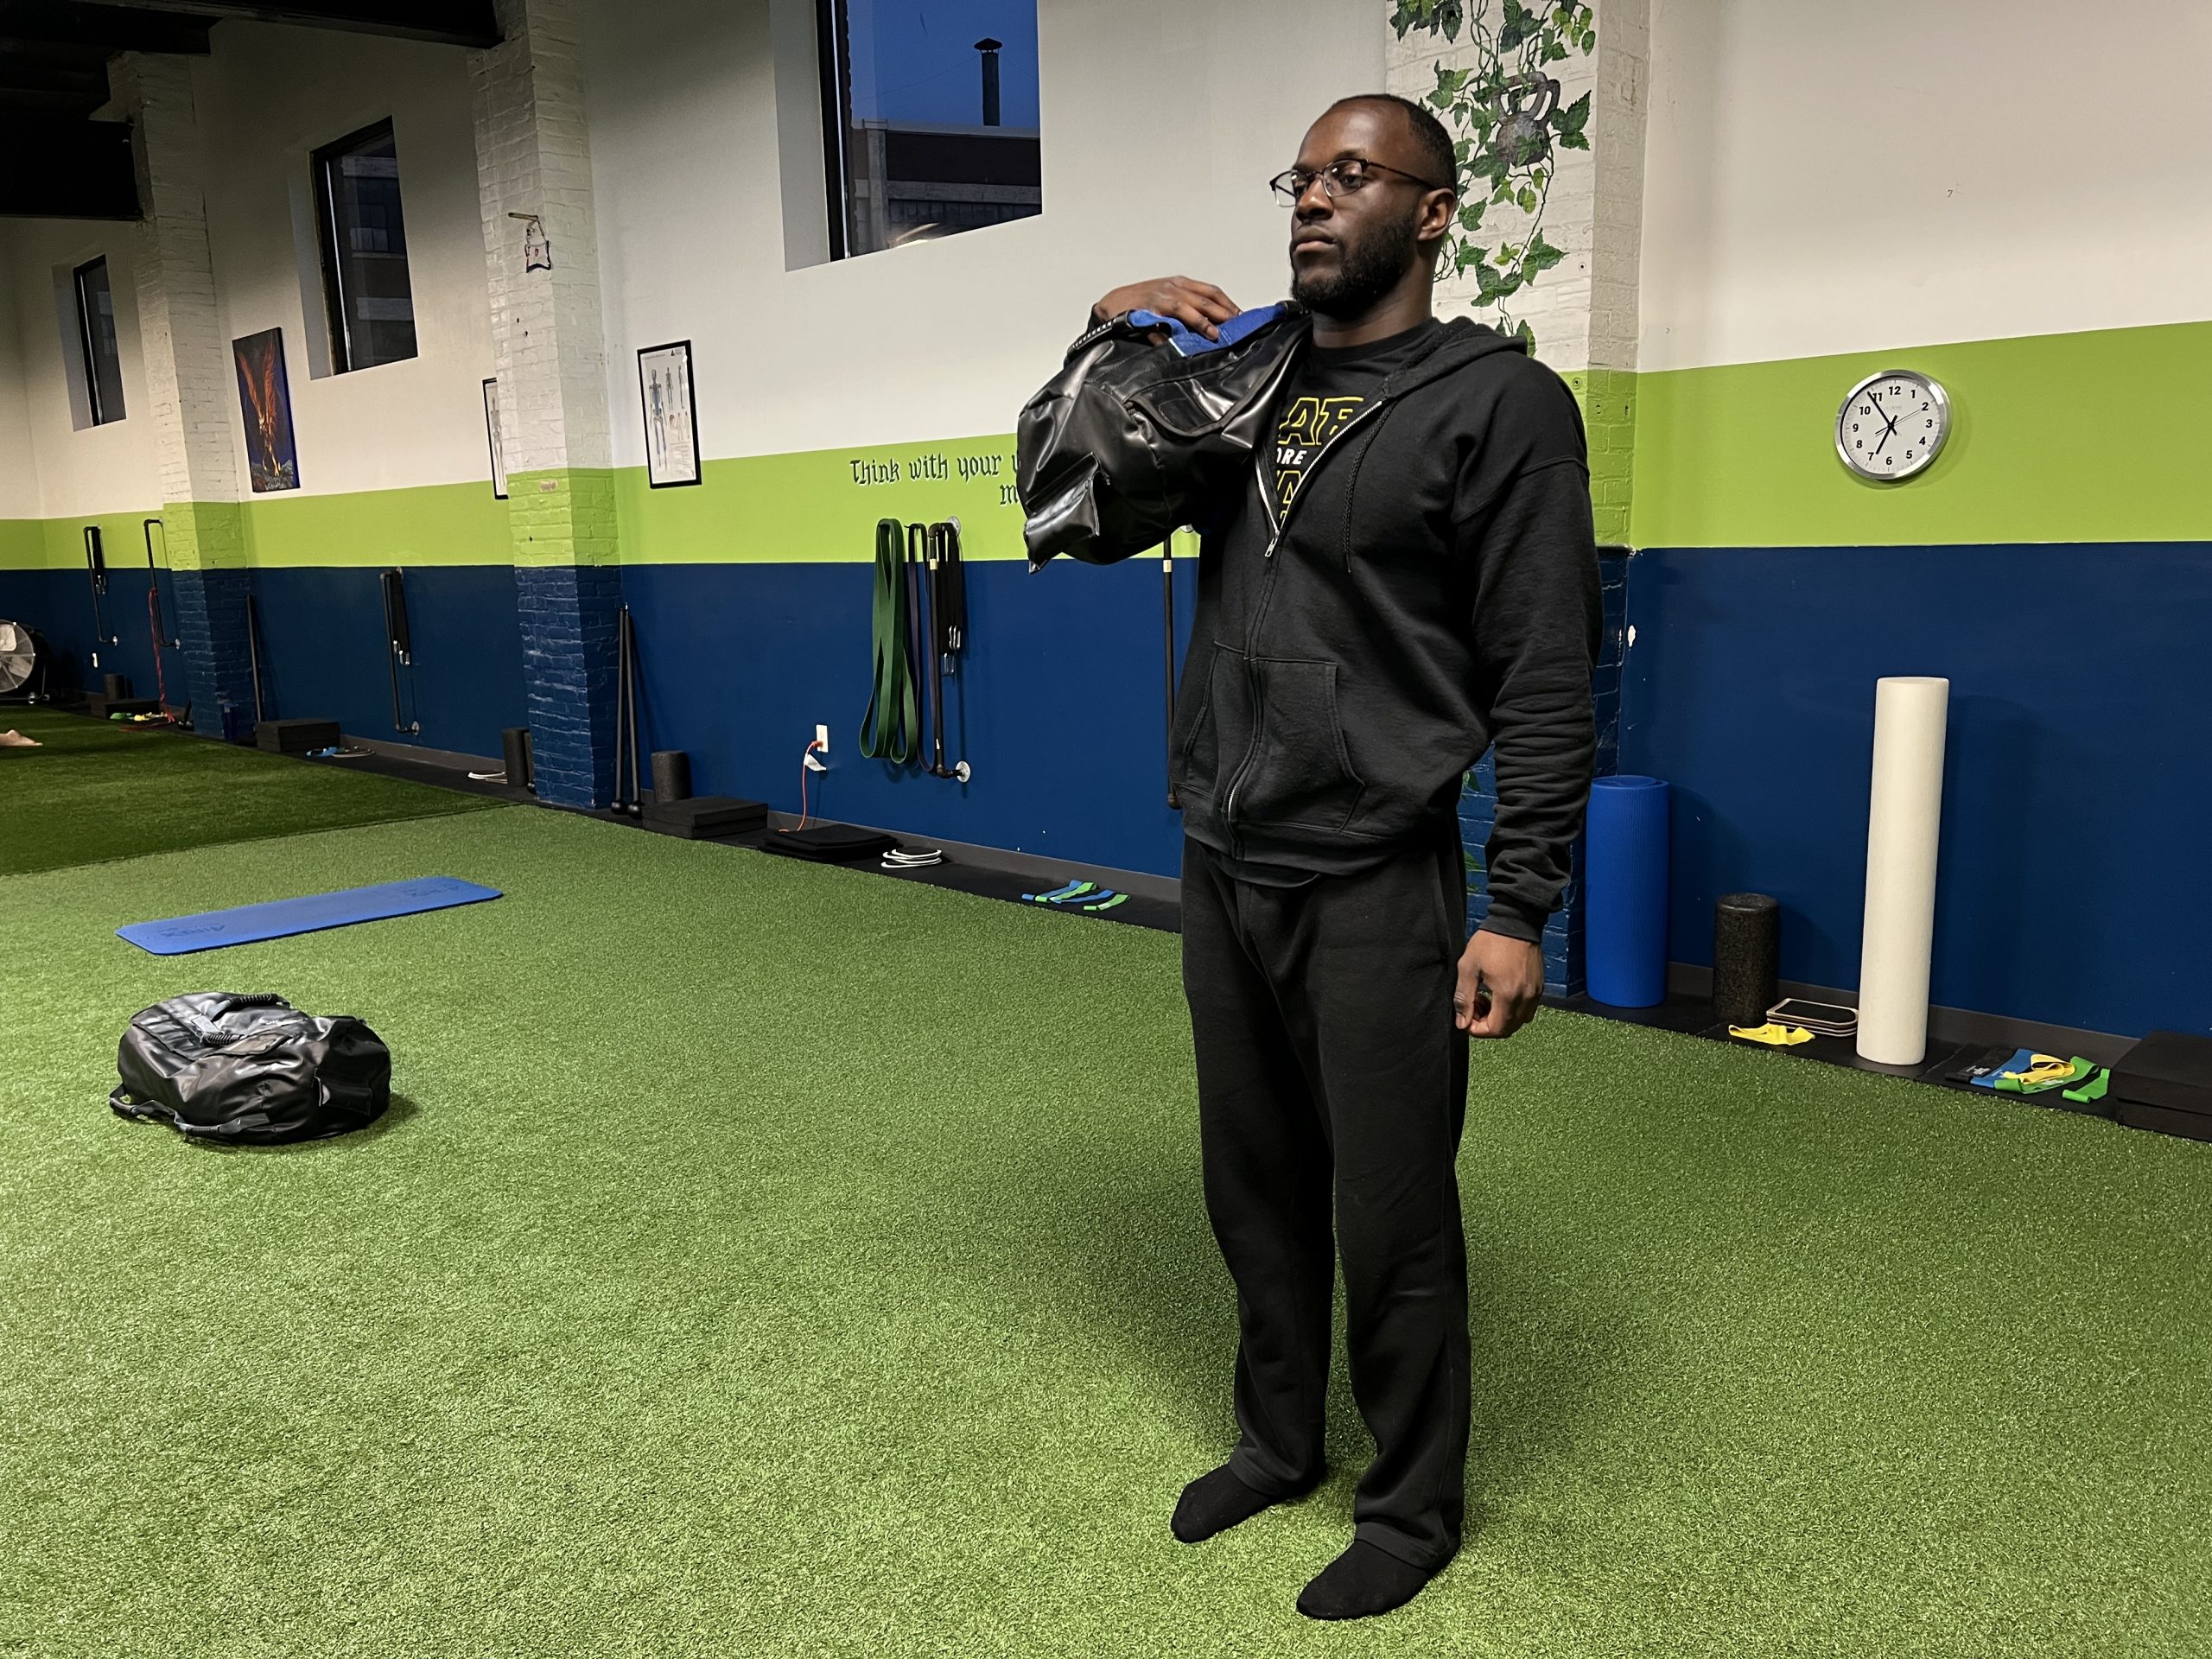
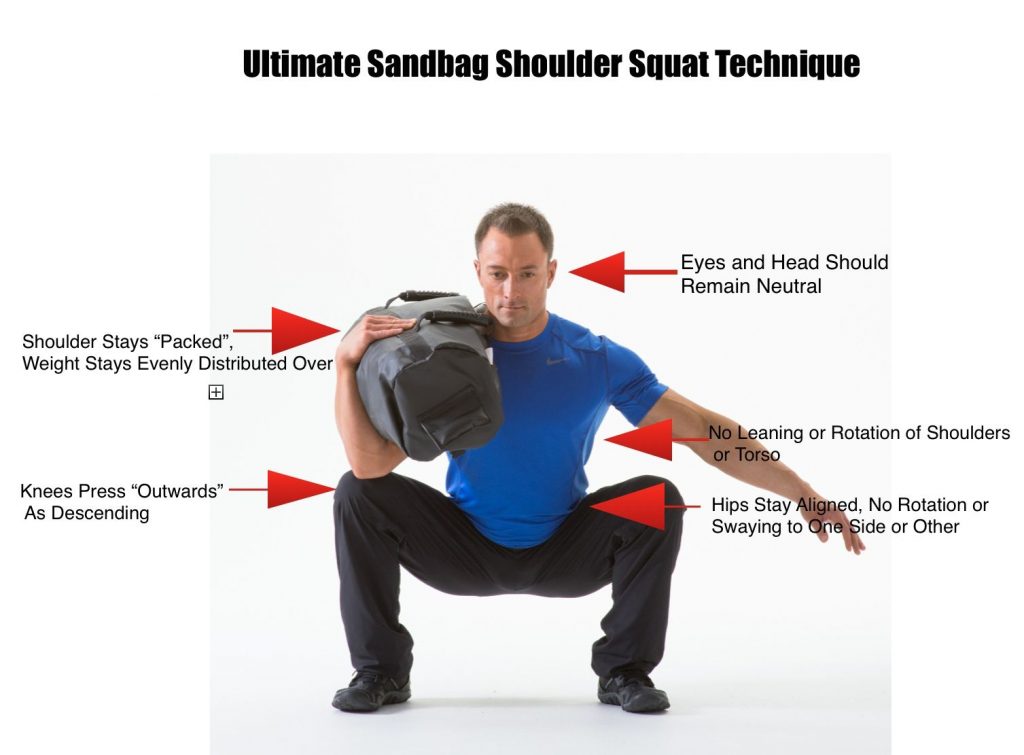
Most people struggle to not have the pelvis shift laterally or rotate during the Shoulder position but if done correctly it is immensely beneficial for stability and strength.
These five different holding positions already provides you with five variables for increasing (or decreasing) the intensity for many exercises. Now, talking about the principles of the holding position is one thing, but how does that look out on the training floor? I’m glad you asked!
I feel, on average, I see a client at least twice a week – maybe you can say the same. And let’s just say we will stick with using USBs exclusively so we don’t have to talk about increasing intensities with other implements (whew). How would I make a program for someone I see twice a week? It might look like this…
As you can see from above it can be pretty simple to change the intensity of your clients’ sessions by a small change in a training variable…this time, holding position. You might be looking at these two sessions and say, ‘Hey – looks like we’re having them perform the same squat in A & B.’ You could probably make that same argument for the bent-over rows (BOR). However, I will tell you that when your client does the USB FL Squat on, let’s say Monday, and comes back (maybe Thursday) to perform that same squat with the same weight, but now on the fists – HOLY COW, it will be an entirely different story for them!
I know from over eight years experience with the DVRT system at Fitness Lying Down how this story goes. You might be uncertain about this and feel like your client will call you out on doing the same squats/BOR earlier in the week. And, of course, you want to keep your clients engaged and not have them get bored with your programming and leave for the next best thing in town or online, but these small sprinkles are exactly what you and your clients need to keep the sessions effective and fun!

Two more thoughts on the above program; thanks for sticking with me this far! At Fitness Lying Down we really don’t like to double-dip holding positions in the same session. What do I mean by this? If we are doing USB Good Mornings with the bag in the front loaded position then we avoid doing USB FL Reverse Lunges or Squats on that same day. However, front load and fist load are two different positions – so have fun with that one! And now that you have a good idea of viewing programming with movements, take a look at the above program and notice the various movement patterns and not just the exercises they represent:
Hinge Pattern
Press Pattern
Squat Pattern
Pull Pattern
Lunge Pattern
Anti-Rotation Pattern
My hope is that you can begin seeing the potential to your programming with only these two simple, but important training variables: movement strength training & holding position. Especially if you have been struggling with applying DVRT concepts into your program design. Truth be told, I’m crazy excited to meet you soon with another variable to consider when programming. Until then, happy sandbagging!
Don’t miss this week 30% off our Ultimate Sandbag water systems (a drop down option on our Ultimate Sandbags were you get sand fillers as well) and get 10 FREE workouts use code “spring” HERE . Can’t make it to Cory’s great gym, Fitness Lying Down? You can train like he does with his great training programs like Dynamic Strength HERE. Also don’t miss Cory leading our DVRT Restoration Certification, our powerful corrective exercise program HERE
View this post on Instagram
© 2026 Ultimate Sandbag Training. Site by Jennifer Web Design.


